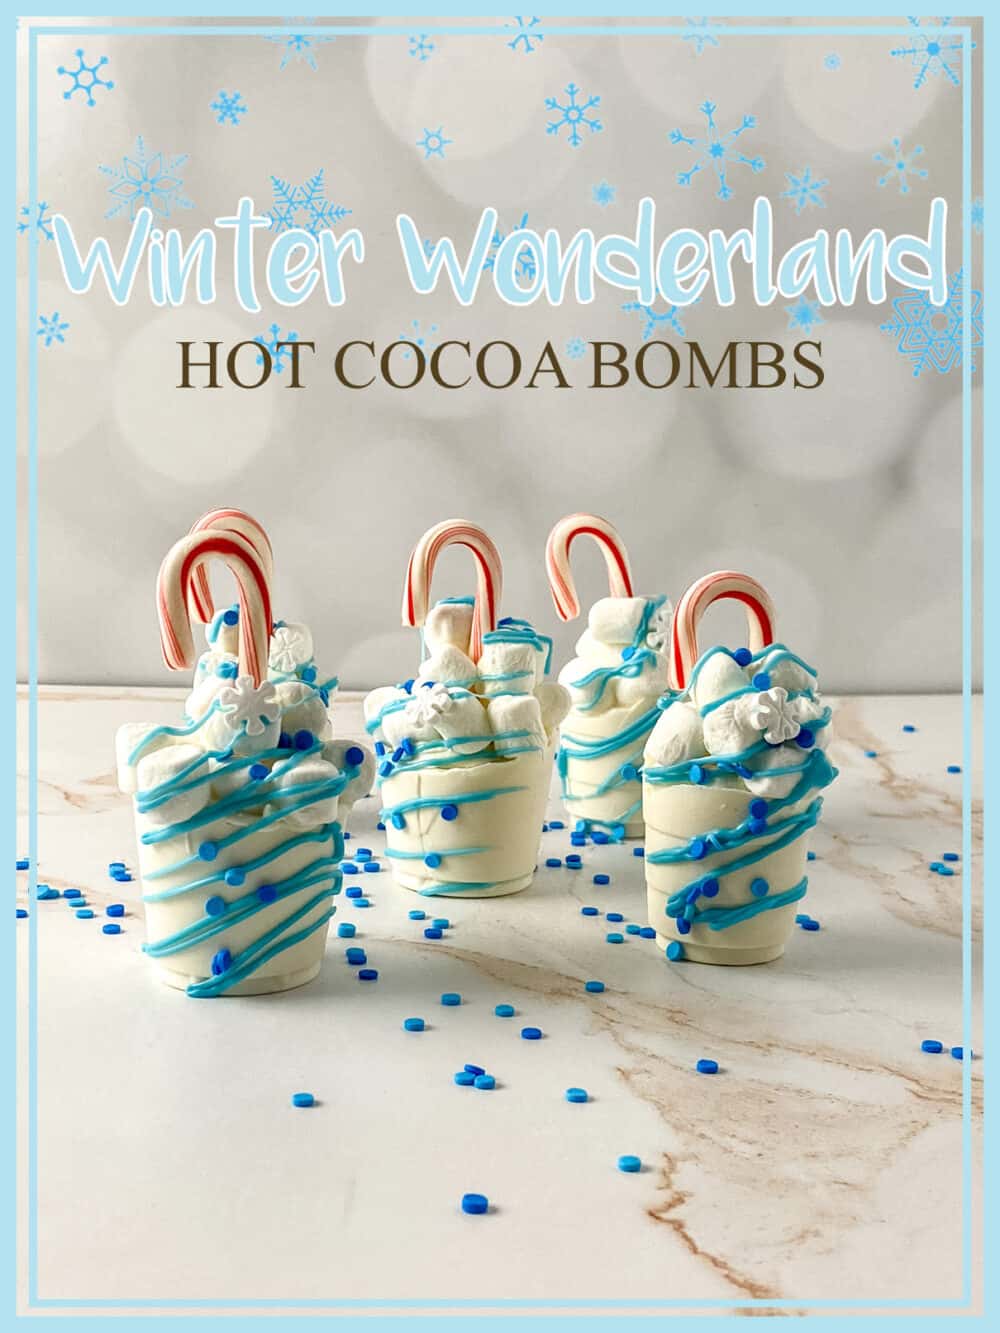
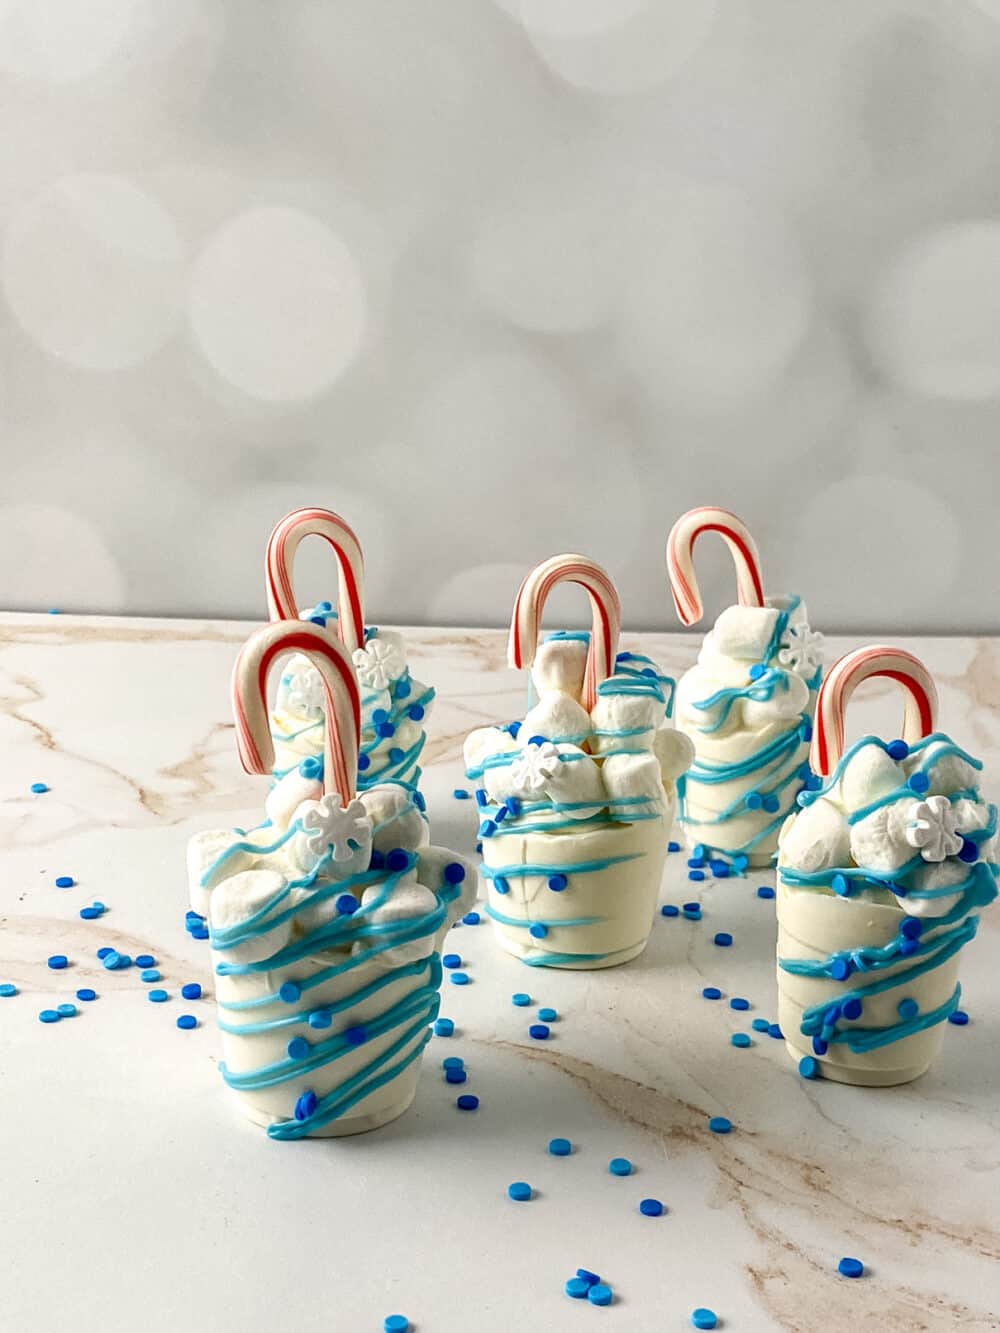
It’s a winter wonderland out there – and these gorgeous hot cocoa bombs are really hitting the spot! Make your own with this great hot chocolate bomb recipe!
There’s something about a warm cup of hot chocolate that makes winter bearable! These cute hot chocolate melts are delicious, beautiful and perfectly on theme for enjoying this winter!
Looking for more hot cocoa fun? Check out our Hot Cocoa Charcuterie Board Ideas! They’re perfect for a party or get together.

What are hot chocolate bombs?
Hot chocolate or hot cocoa bombs are large shapes of hardened chocolate (or candy melts) that melt when placed in a large cup of hot milk. Sometimes, the hardened chocolate is hollow, with additional ingredients inside like cocoa powder, sprinkles, and marshmallows for additional taste.
Can I Freeze Hot Chocolate Bombs?
Yes, they are great for freezing. Just be sure to store them properly (I like to wrap mine in plastic wrap and then another layer of aluminum foil). They can be stored in your freezer for up to six months.
The Cutest Winter Wonderland Hot Chocolate Bomb Recipe
Ok, folks – here’s the recipe for ONE Hot Chocolate Bomb. If you are making multiples make sure you have enough ingredients for the number you are making! I hope you enjoy these gorgeous winter-themed treats as much as our family does!
Ingredients
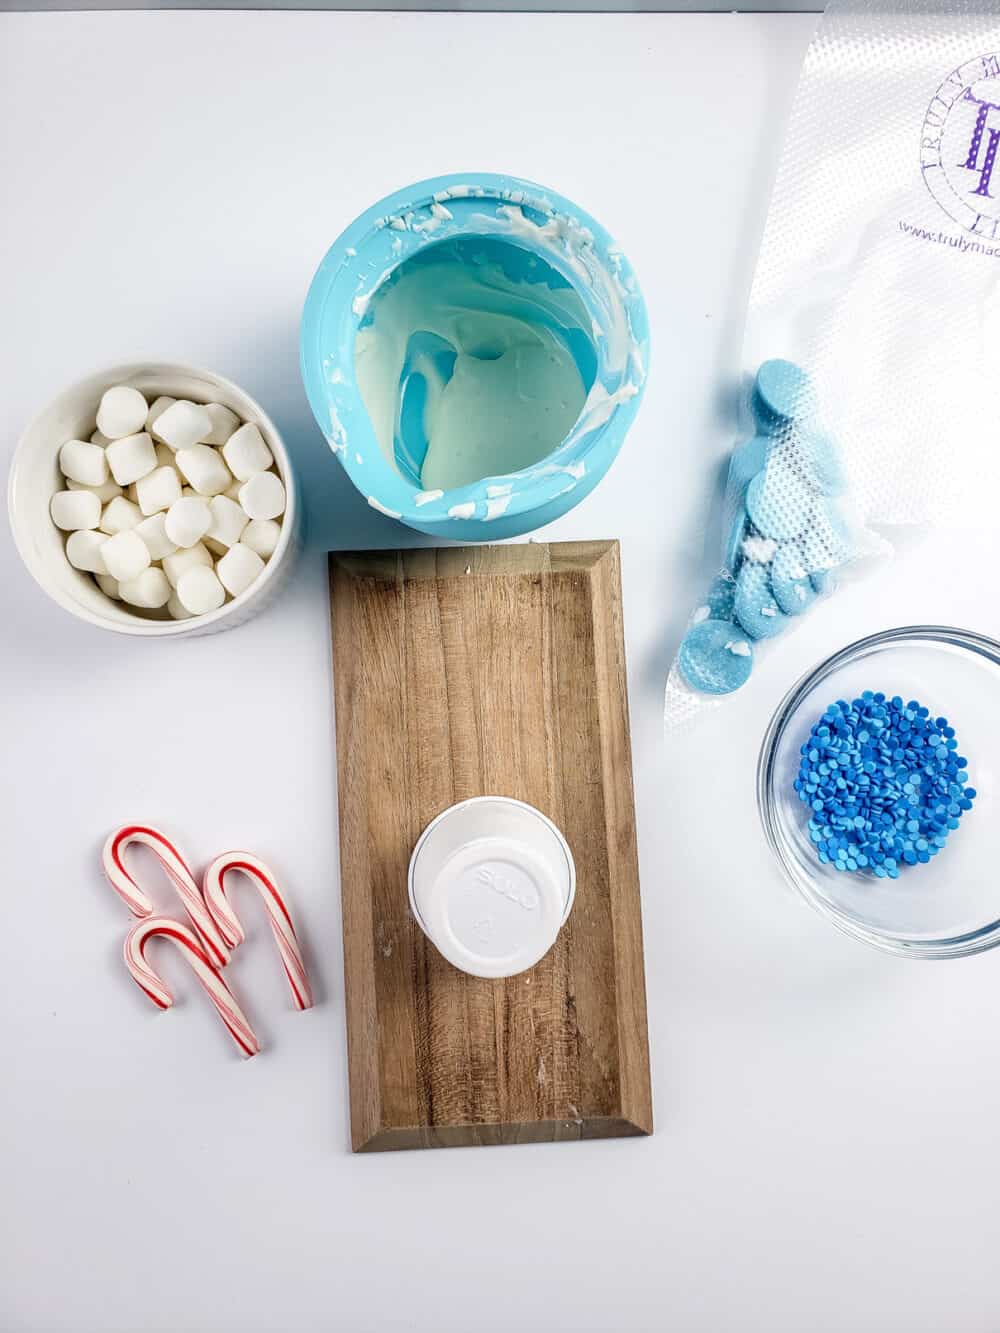
- 2 oz white candy melts (you may also use almond bark or melting wafers)
- 1 oz blue candy melts
- 7-10 mini marshmallows
- Holiday sprinkles, optional
- 1 miniature candy cane


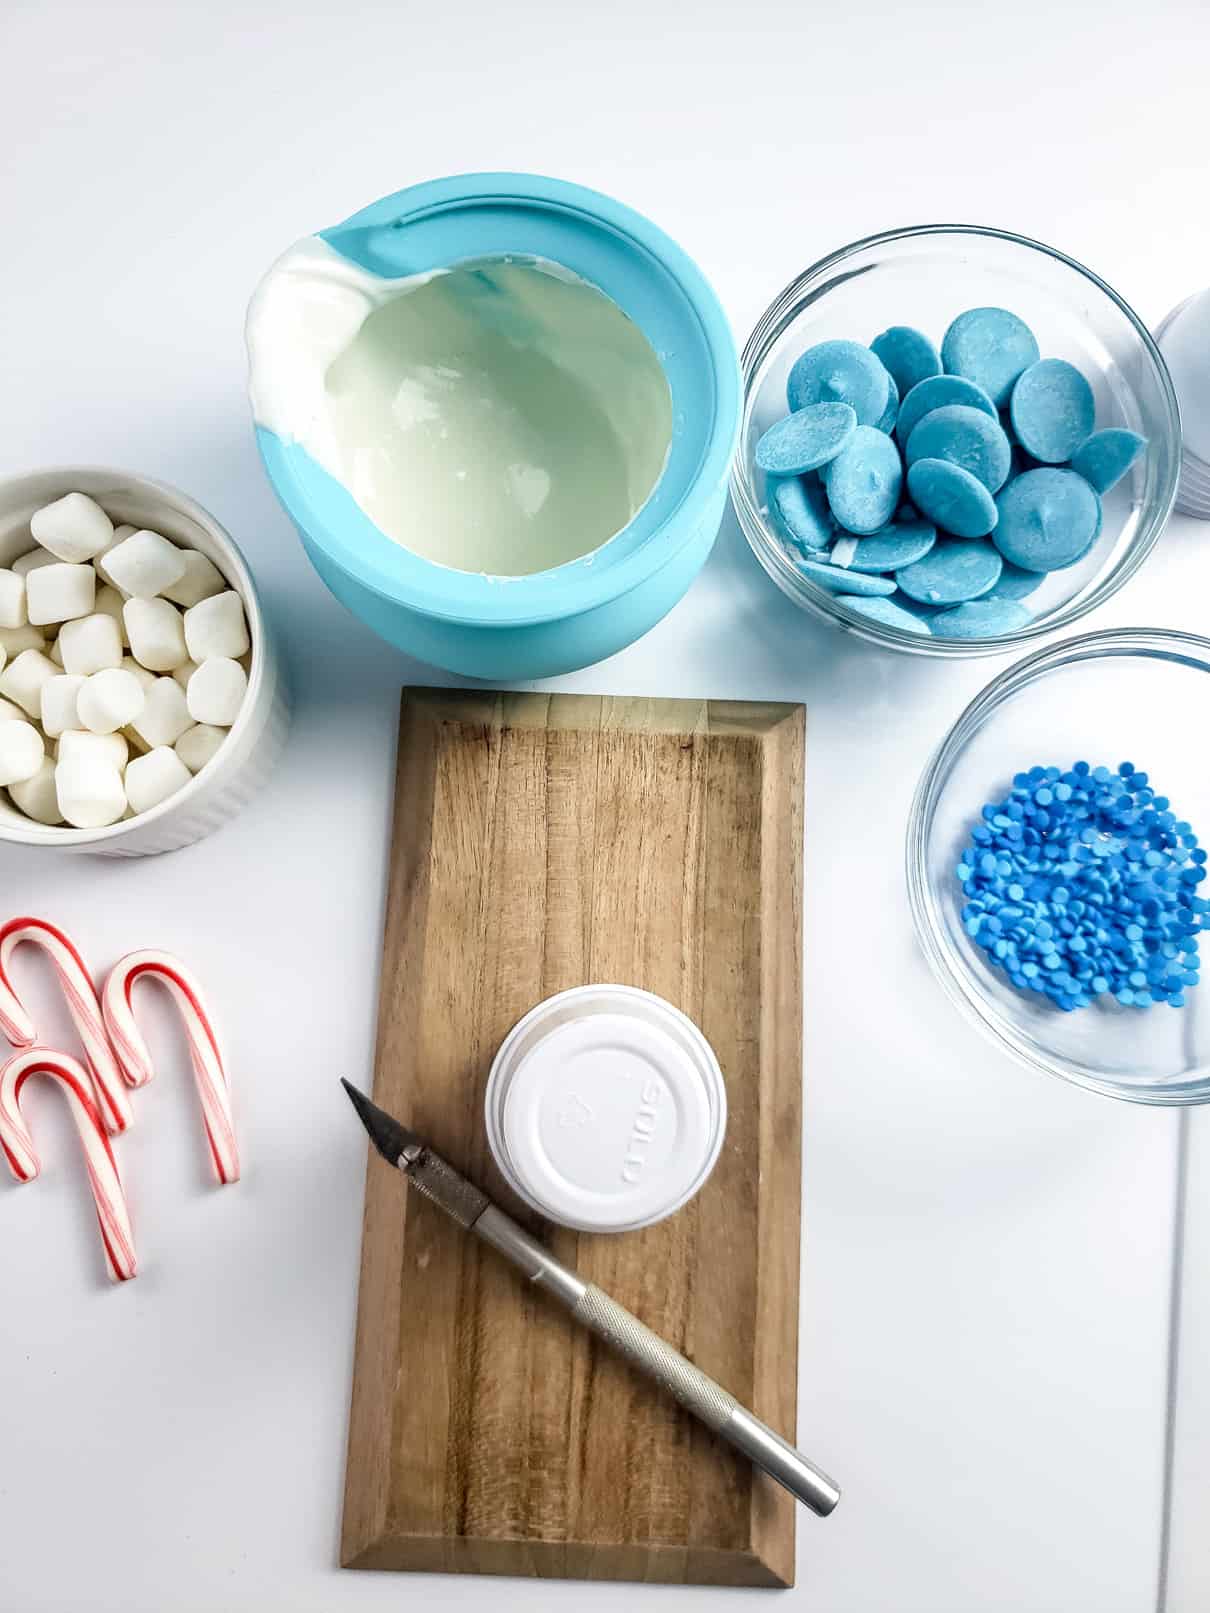

Equipment
- Parchment Paper
- 2 oz disposable cups
- Xacto Knife
- Piping bag
- Scissors
- Cutting board
- Small microwaveable bowls
Yields: 1 hot cocoa bomb
Instructions
Begin by melting white candy melts according to the packages’ instructions. Careful to not over-melt them as they can burn easily.
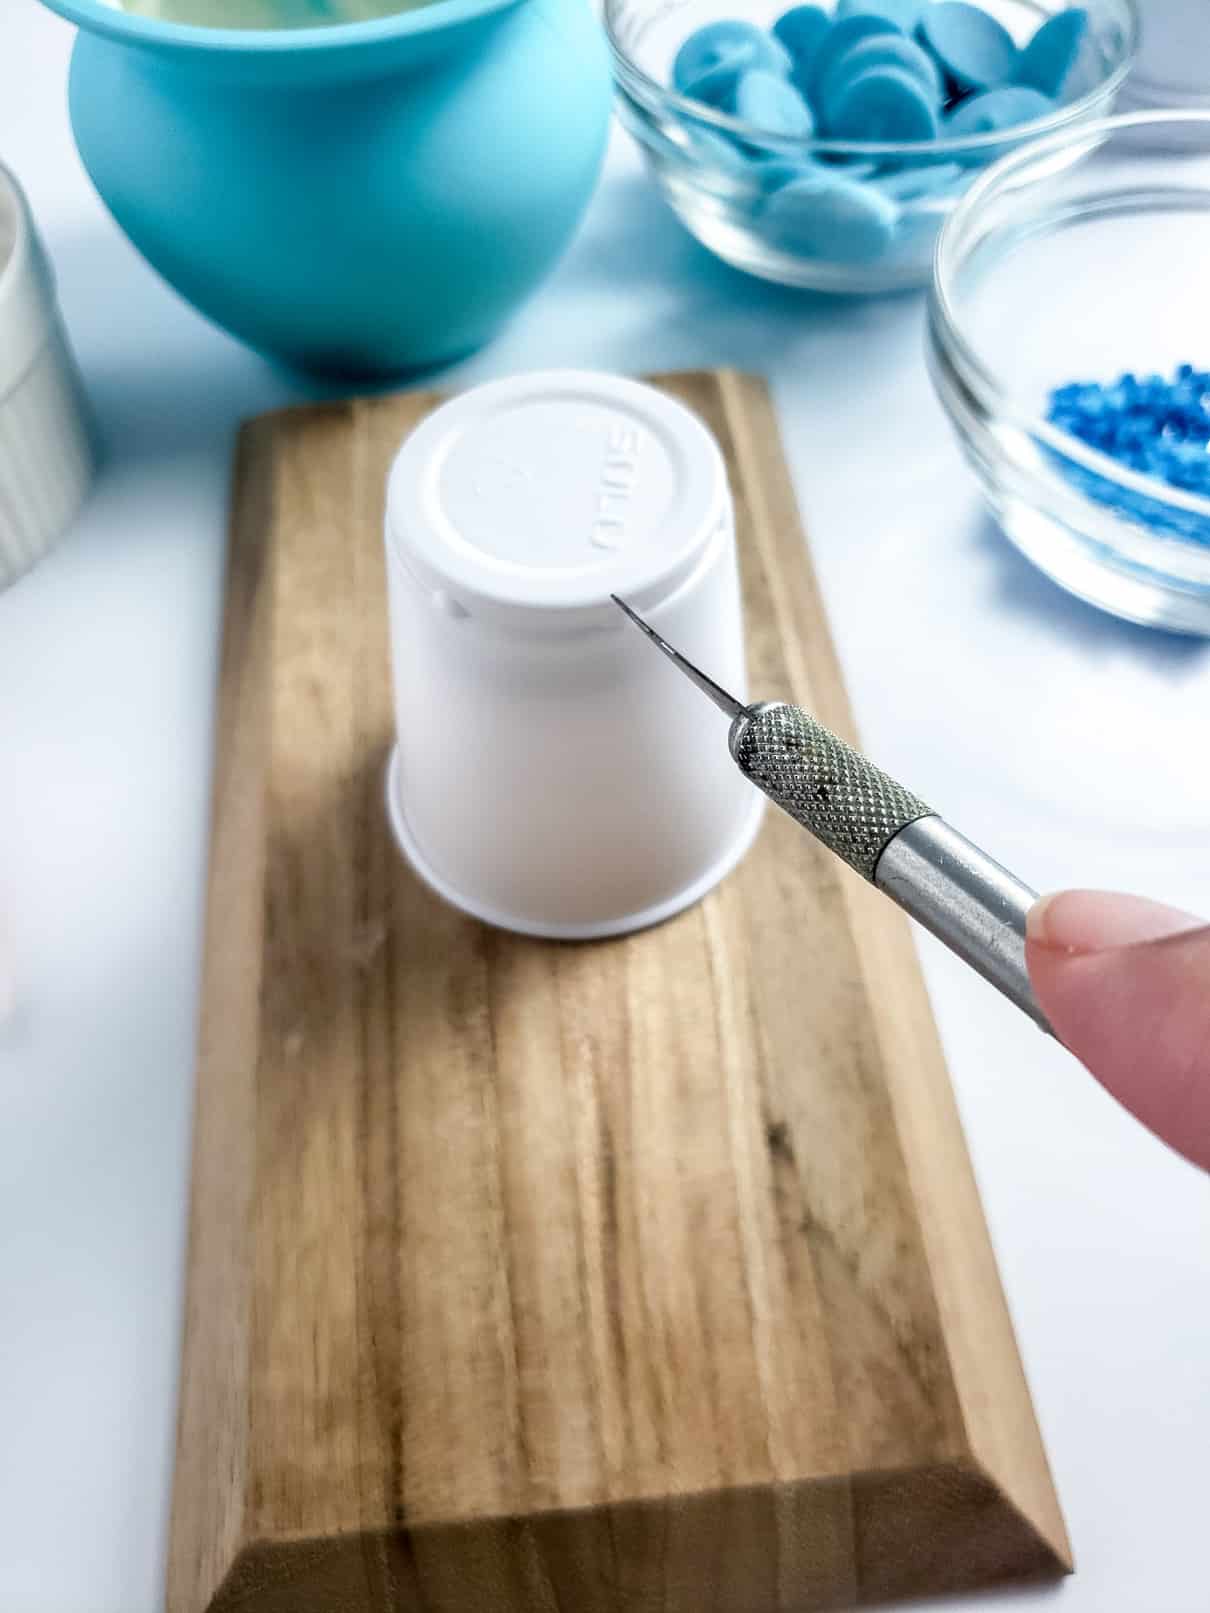
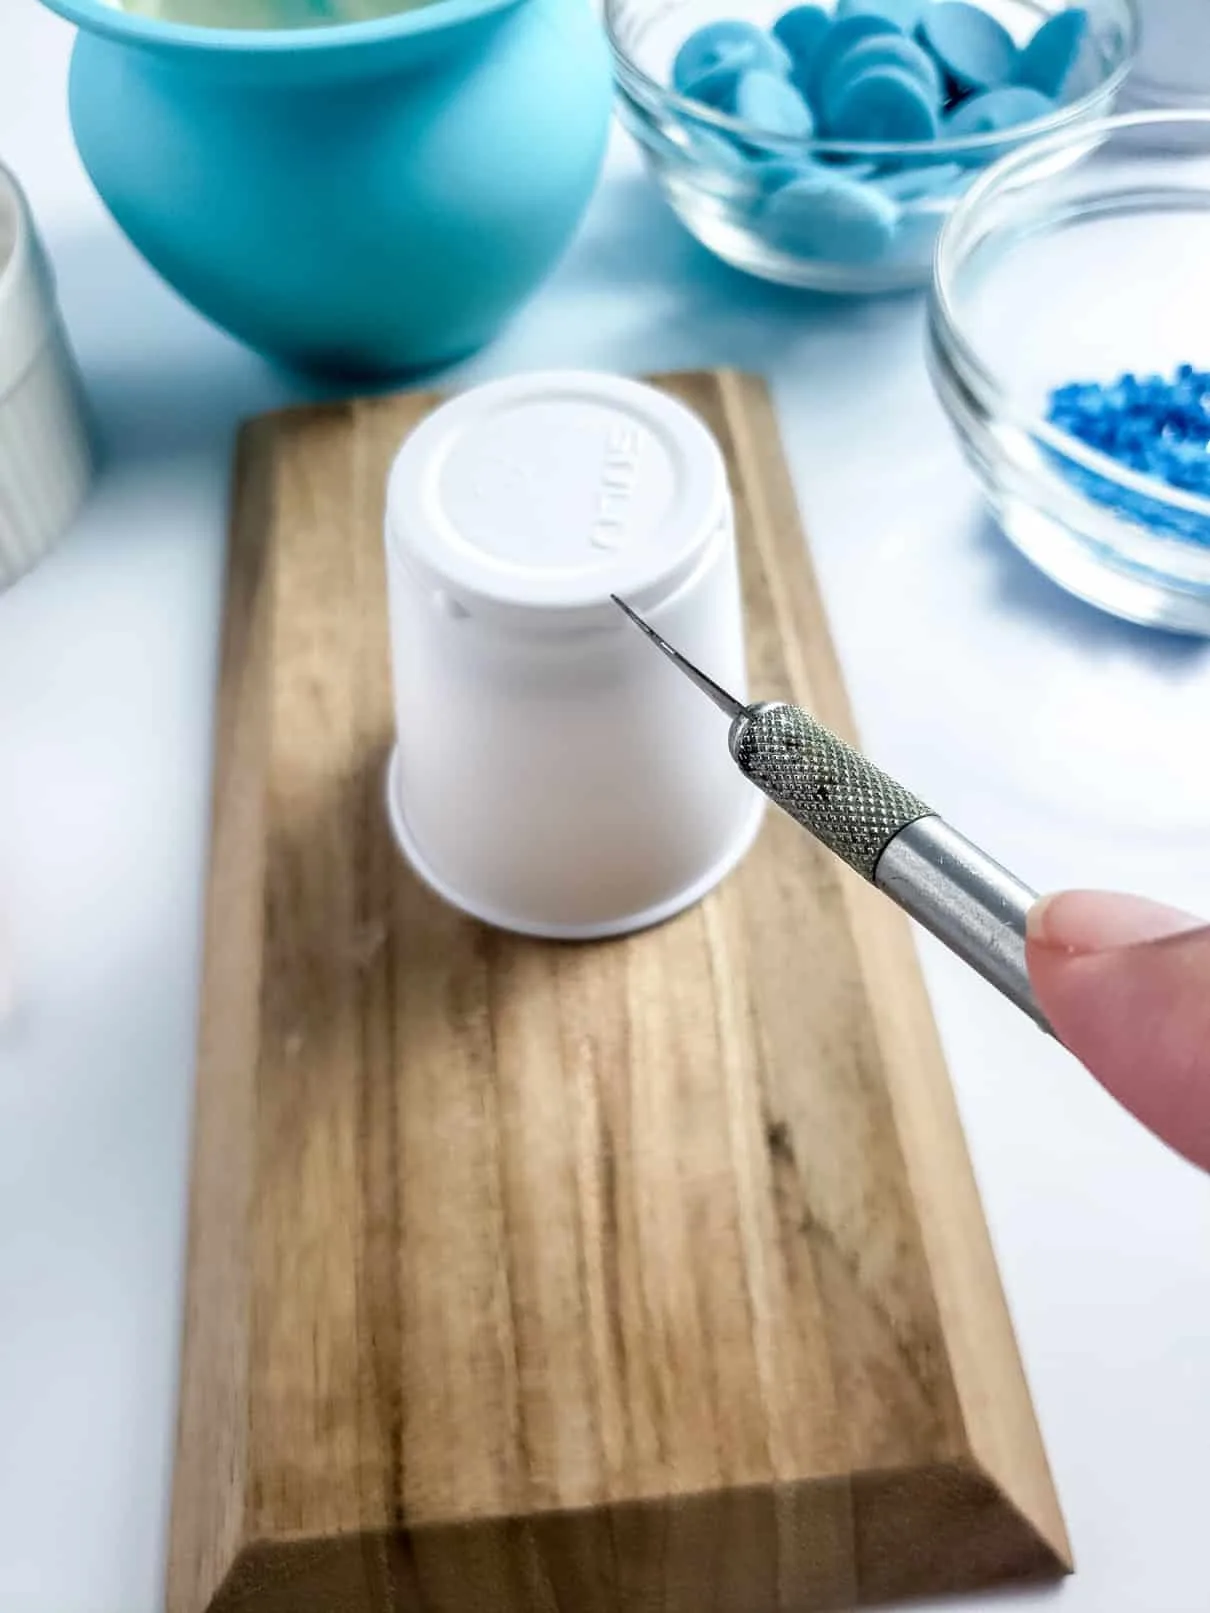
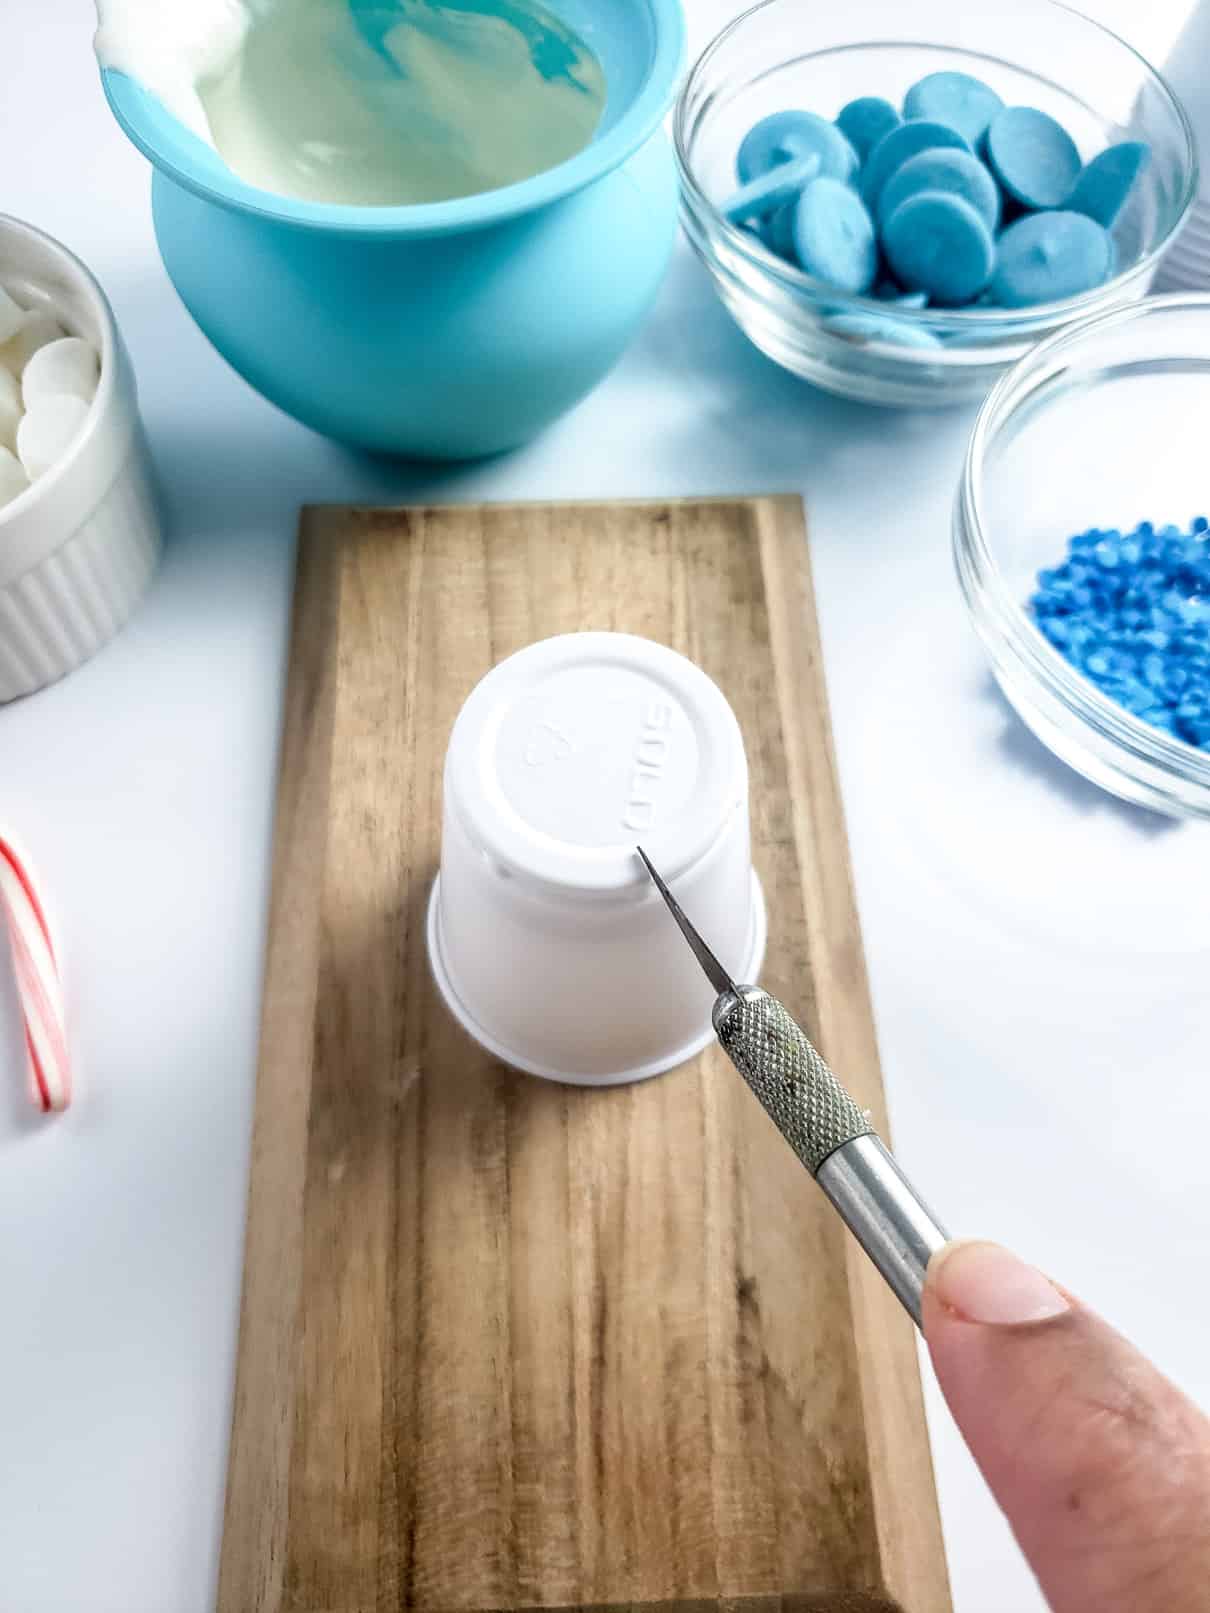
Take one plastic cup and place it upside down on a cutting board. Use the X-acto knife to cut a line down the side.


Pour melted white candy into the cup, twisting it as you pour (you want to get the sides/contour of the cup).


Turn the cup upside down on a piece of parchment paper to allow any extra chocolate to drip off.

Place the cup in the freezer for 7 to 9 minutes.
Once the time is up, remove from the freezer. Add more melted chocolate on top of that, filling it ¾ full.
Return to the cup to the freezer to harden for 18-25 minutes.
Remove the cup from the freezer and turn the cup upside down on a cutting board. Make cuts in the rim (all the way around).
Starting with the original side slit, carefully peel off the cup until chocolate is released.
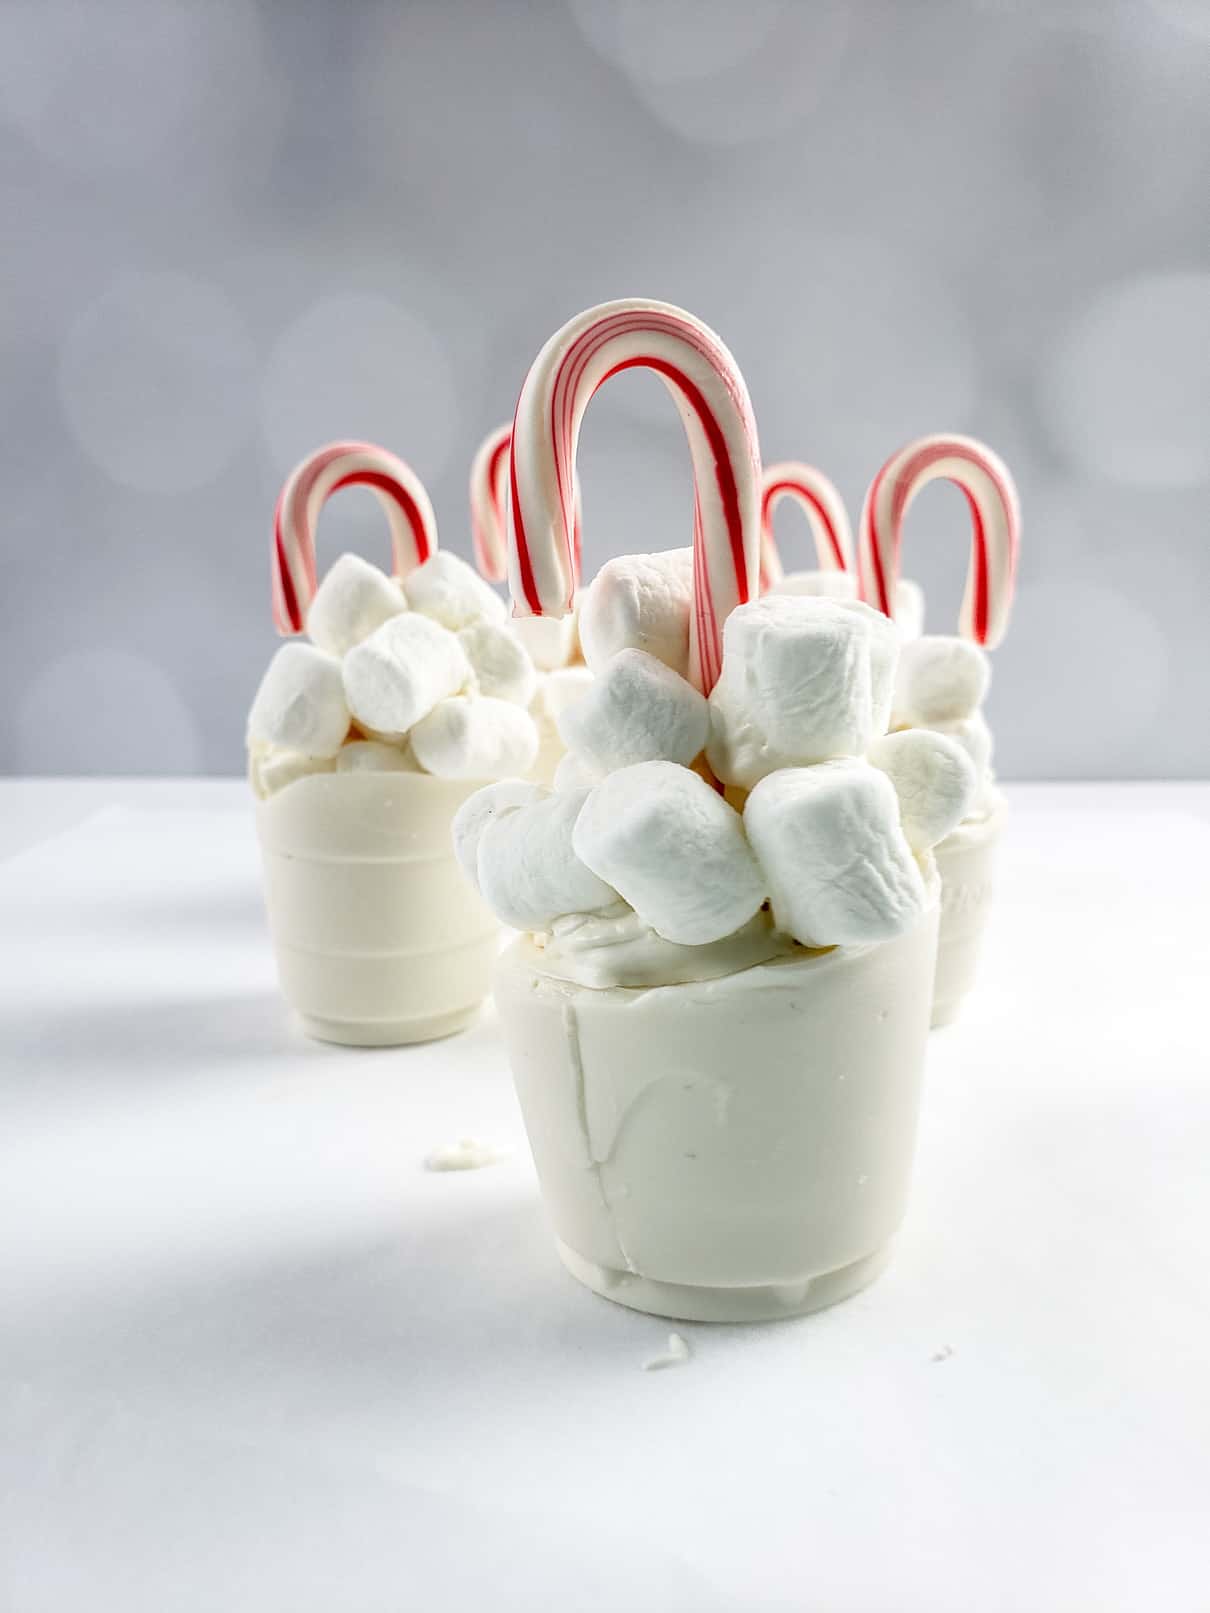
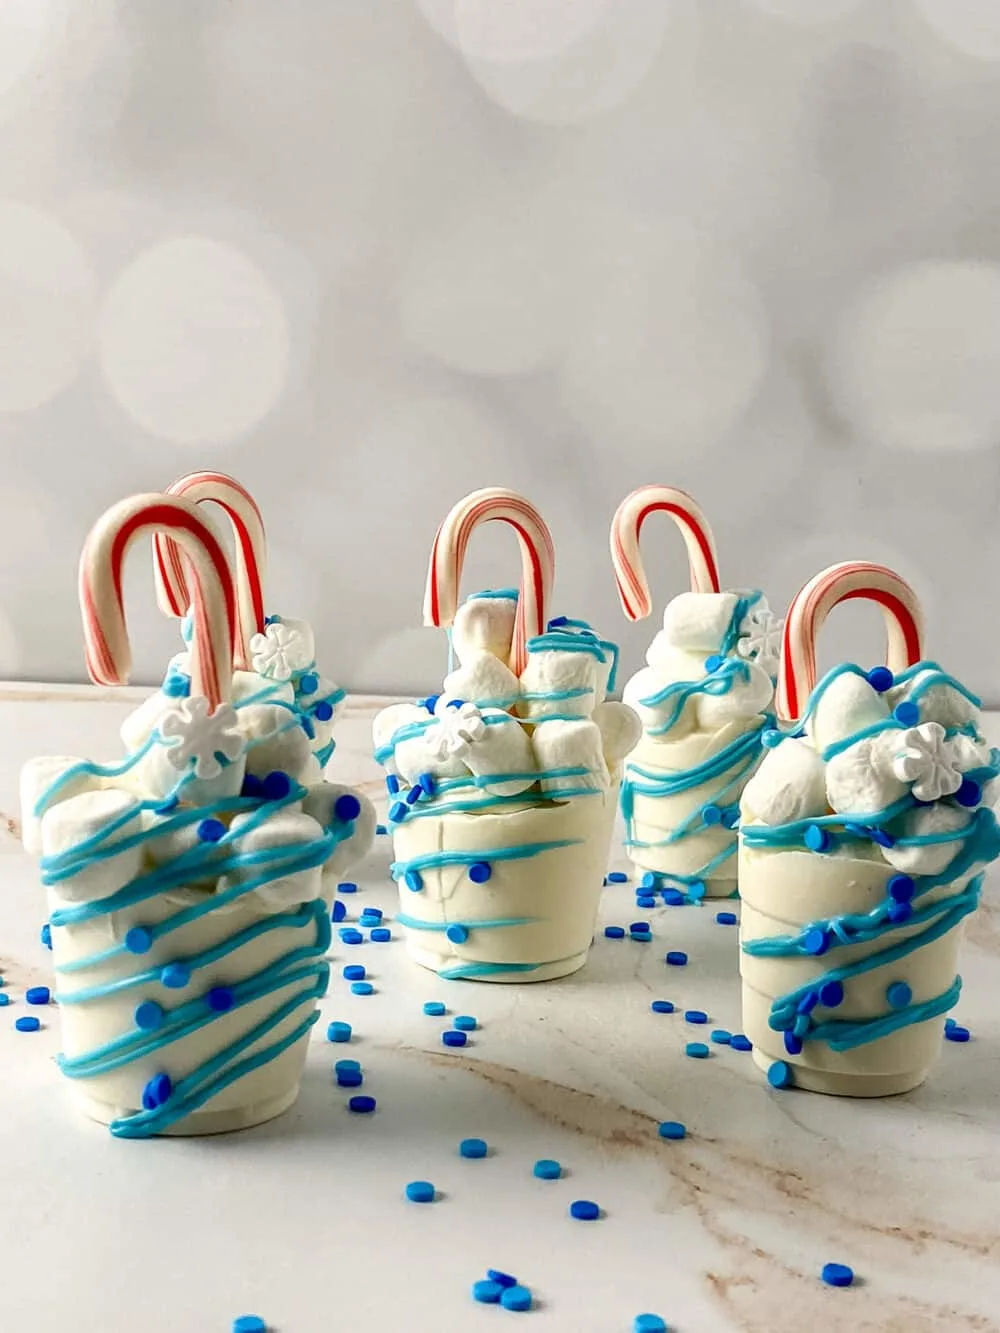
Next, add a small amount of melted chocolate to the top, topping off with mini marshmallows, sprinkles and a mini candy cane.


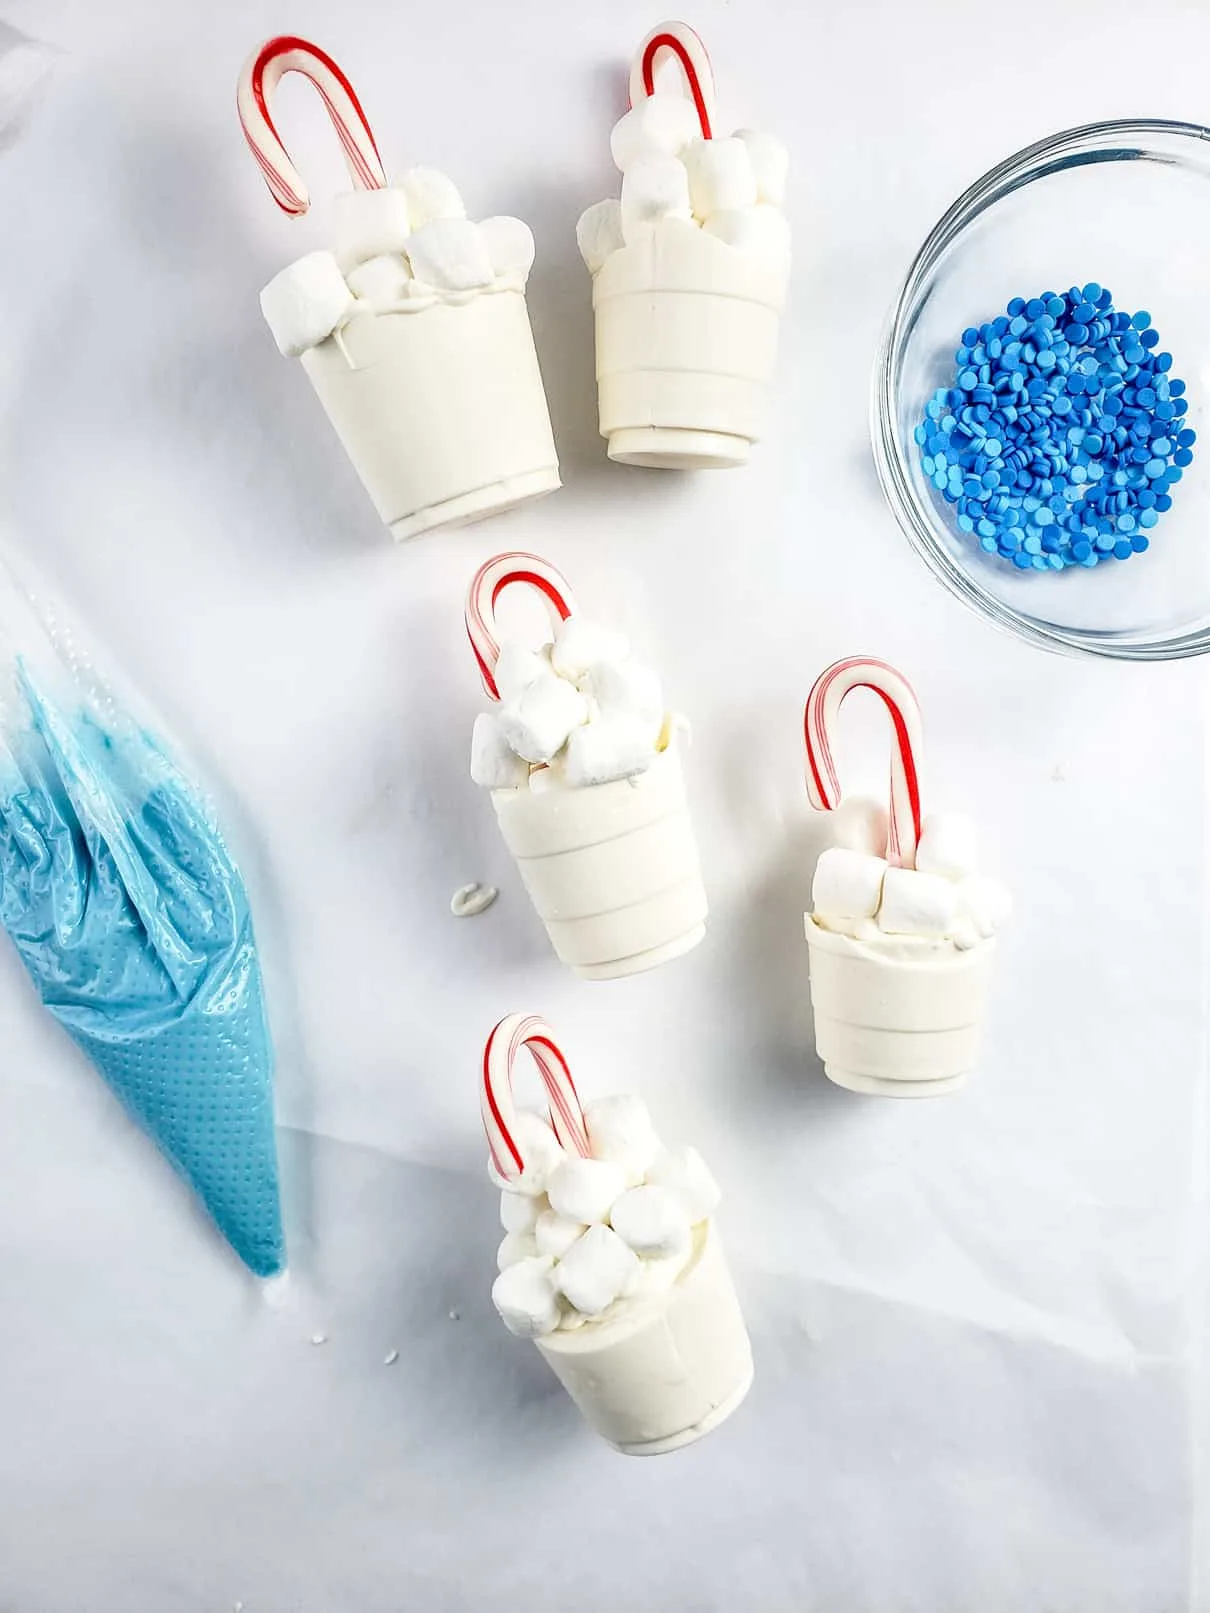
Melt the blue candy and scoop into a piping bag. Use to decorate and as an edible “glue” to add on additional sprinkles and marshmallows.


Return to the freezer for a final set, about 7-8 minutes.

Option to create cups with powdered hot chocolate
Do you want your Winter Wonderland Hot Chocolate Bomb to have some hot chocolate mix as a tasty surprise? It’s totally doable! Here’s how:
Instead of filling the cavity completely with chocolate, add 1 tbsp of cocoa powder. Then, add melted chocolate on top and allow to set in freezer for 15 minutes. Then proceed to the remaining steps to remove it from its cup and decorate.
Tips for Making and Enjoying Your Hot Chocolate Bombs
The fastest way to melt the chocolate is by using really hot milk.
What happens when it cracks while unmolding? If the top cracks, you can hide it by adding more melted chocolate, and topping it with marshmallows. However, if the shell breaks completely, you will have to melt it back down and try again.
This recipe has about a 90% success rate. The more you do, the better they will look – it takes practice! Depending if you use candy melts, melting wafers, or almond bark, some cups will be thicker/sturdier than others.


Winter Wonderland Hot Chocolate Bombs
It’s snowy out there, and these Winter Wonderland Hot Chocolate Bombs do the trick! Warm up to these sweet creations, and cozy up to a delicious cup of hot chocolate!
Ingredients
- 2 oz white candy melts (you may also use almond bark or melting wafers)
- 1 oz blue candy melts
- 7-10 mini marshmallows
- Holiday sprinkles, optional
- 1 miniature candy cane
Instructions
- Begin by melting white candy melts according to the packages’ instructions. Careful to not over-melt them as they can burn easily.
- Take one plastic cup and place it upside down on a cutting board. Use the X-acto knife to cut a line down the side.
- Pour melted white candy into the cup, twisting it as you pour (you want to get the sides/contour of the cup).
- Turn the cup upside down on a piece of parchment paper to allow any extra chocolate to drip off.
- Place the cup in the freezer for 7 to 9 minutes.
- Once the time is up, remove from the freezer. Add more melted chocolate on top of that, filling it ¾ full.
- Return to the cup to the freezer to harden for 18-25 minutes.
- Remove from freezer and turn the cup upside down on a cutting board. Make cuts in the rim (all the way around).
- Starting with the original side slit, carefully peel off the cup until chocolate is released.
- Nest, add a small amount of melted chocolate to the top, topping off with mini marshmallows, sprinkles and a mini candy cane.
- Melt the blue candy and scoop into a piping bag. Use to decorate and as an edible “glue” to add on additional sprinkles and marshmallows.
- Return to the freezer for a final set, about 7-8 minutes
Notes
The fastest way to melt the chocolate is by using really hot milk.
What happens when it cracks while unmolding? If the top cracks, you can hide it by adding more melted chocolate, and topping it with marshmallows. However, if the shell breaks completely, you will have to melt it back down and try again.
This recipe has about a 90% success rate. The more you do, the better they will look - it takes practice! Depending if you use candy melts, melting wafers, or almond bark, some cups will be thicker/sturdier than others.
Do you want your Winter Wonderland Hot Chocolate Bomb to have some hot chocolate mix as a tasty surprise? It’s totally doable! Here’s how: Instead of filling the cavity completely with chocolate, add 1 tbsp of cocoa powder. Then, add melted chocolate on top and allow to set in freezer for 15 minutes. Then proceed to the remaining steps to remove it from its cup and decorate.
Nutrition Information:
Yield:
1Serving Size:
1Amount Per Serving: Calories: 640Total Fat: 1gSaturated Fat: 0gTrans Fat: 0gUnsaturated Fat: 1gCholesterol: 0mgSodium: 95mgCarbohydrates: 158gFiber: 0gSugar: 106gProtein: 1g
Nutrition info included as a guide. No guarantees are made that the information is accurate.